How to make flying stands removable using barrel clasps!

nezeray

Mongoose
If you've ever heard me mention barrel clasps, here's the webpage where I learned how to do it. Also Scott Mellon told me how to last year. :)

http://www.star-ranger.com/BasingMinis.htm

Nezeray
 
Thanks a heap for this idea! I used this method and love it.

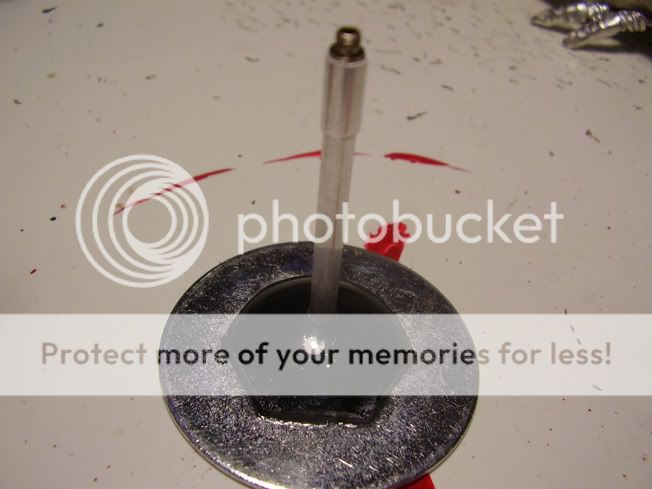
However, one thing I learned is (the hard way of course), when you're placing the female clasp end in the mini and your gluing it in, be careful that the glue doesn't squish into the center of the clasp through the wire loop hole. It could either ruin the internal threads (thus making the male end not fit flush or not fit at all) or, if you screw the male end in when its still wet, permanently bond it.

To keep this from happening in my application, prior to installing it, I took a tiny shaving from a model and wedged it in the opening where the wire loop went and applied some heat to it enough to melt the shaving. Basically, it soldered the hole closed.

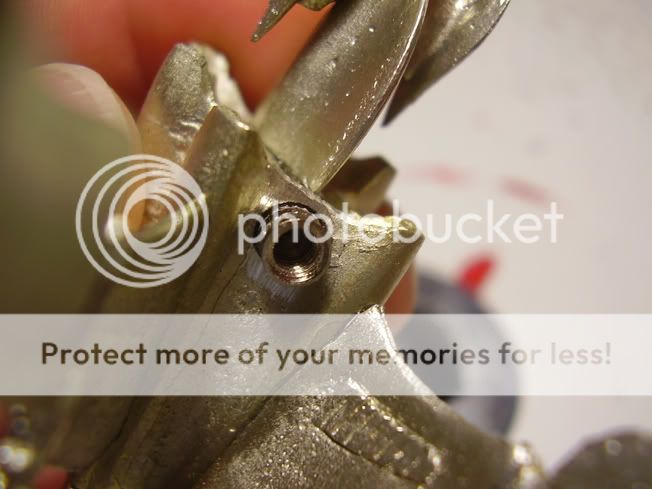
Another thing I did was replace the sleeve "joint" with a continuous long sleeve that runs from the clasp to the base. That seems to streamline the look of the base/stem.
 
I did the same thing with the sleave, just used one piece of tubing, slide the male clasp in one end and drilled out the flying base to fit the larger tube.

When you paint them black, they don't look huge. ;)

Nezeray
 
nezeray said:
I did the same thing with the sleave, just used one piece of tubing, slide the male clasp in one end and drilled out the flying base to fit the larger tube.

I use a solid rod in the base and slide the copper tube over that. It doesn't matter I suppose but to me it feels more secure than simply gluing the sleeve into the base.

Another tip for anyone who isn't quick enough setting your pieces when working with super glue... you can heat the metal tubes and rods with a small torch and the glue releases. That glue sets ultra fast when your working with tubes that slide tight against each other and I've had a few bind up on me before I got them seated right.
 
I love this. I have started doing this with my ships and it works great. The only thing I did different was use aluminum for both rod parts instead of using brass. Works like a charm.
 
Any particular reason? Just curious. I can't see how it would matter unless aluminum would be slightly more prone to corrosion... but since it'll be painted anyway, not an issue. Of course aluminum is probably cheaper too.


While I'm posting, I haven't got any yet but I suppose there's some ships that have "fins" (for lack of better term) that extend below the ship or some other hindrance to basing in this manner. Has anyone "barrel clasped" one of these? For instance, the Brakiri Avioki heavy cruiser.
 
The Minbari are quite fun to barrel clasp. I should have drilled a hole in them, then countersunk the barrel clasp but I didn't.

I fully assembled the figures then glued the barrel clasp to the "pivot point" of the figures.

I've only had 1 come loose. That was a Vorchan which I glued the barrel clasp to the botton wing where the flying stand is designed to go. Someone playing a demo went to move the figure and pressed down and foward. If I had glued the flying stand directly to the figure's bottom wing, I would have had a broken stand, not just a clasp to glue back on.

As for aluminum verses brass, I have no idea which would be better if any. I just used what was suggested to me. :)

Nezeray
 
It was cheaper and a bit lighter as well and with as many ships as I have ordered I need to save them pennies where I can. I'll post a pic of my Minbari Sharlin that I did.
 
Here's some pics of the Sharlin.

Base.jpg


Sharlinwithpost.jpg


Sharlin.jpg
 
I believe those are old Agents of Gaming bases. You can really use any stable base including those that come with the MGP figures.

James / Nezeray
 
Back
Top